Category: DIY CUT T-SHIRT IDEAS

  • 10 Cute Ways to Cut a Shirt That Actually Look Store-Bought
    You’ve probably tried cutting a t-shirt before and ended up with something that screamed “I did this in my bathroom with kitchen scissors.” That’s not a you problem — most cutting tutorials skip the details that separate a clean, boutique-looking result from a lopsided mess. The difference usually comes down to a few small things: where exactly you cut, how you finish the edge, and whether you take that extra thirty seconds to even things out.

    These 10 cuts are the ones that consistently pass the “wait, did you buy that?” test. Each one is simple enough to finish in ten minutes, and every single one is designed to look intentional, not accidental.

    1. The Knotted Crop

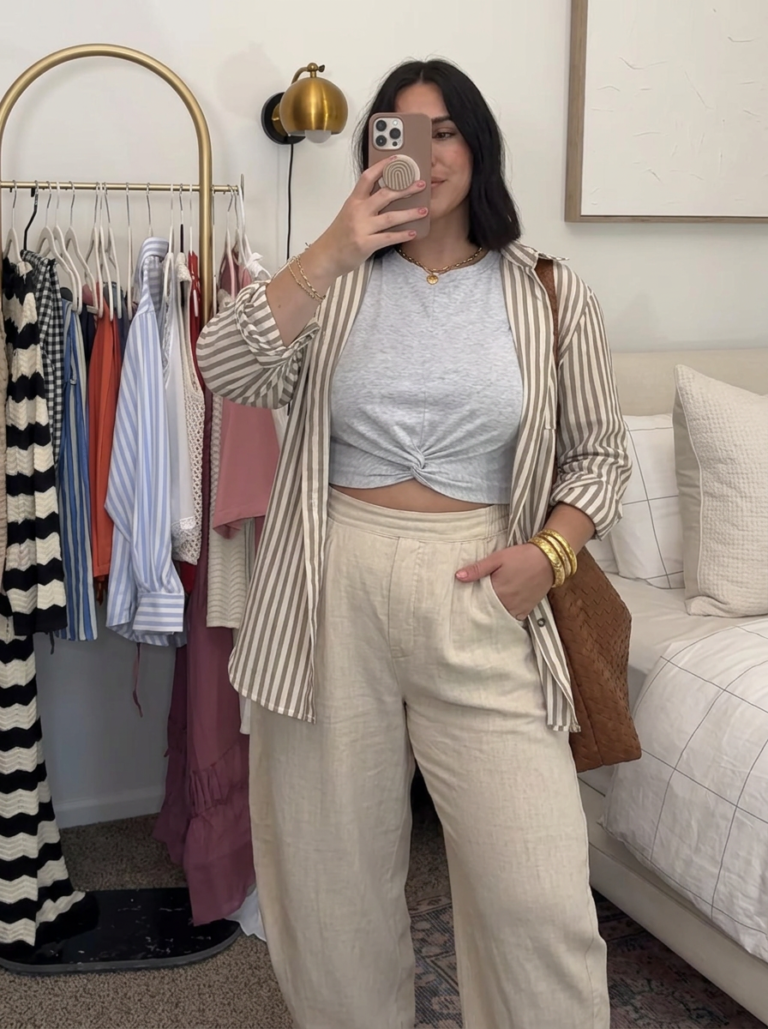
    Cut the shirt straight across about three inches above the natural hem, then cut a small slit at the center front and thread the two new bottom corners through it before pulling snug. The knot does double duty — it shapes the crop at the waist and hides the raw cut edge at the same time, which is exactly the trick that makes this read as designed rather than DIY.

    It is paired with high-waisted straight-leg jeans in a mid-wash blue denim, worn with the waistband sitting just above the knot detail so the two pieces meet cleanly. White low-top canvas sneakers with white laces complete the look, along with a thin gold chain necklace and small gold stud earrings.

    2. The Side Twist

    Cut two short vertical slits into one side seam near the hip, then twist the fabric between them and tuck the twisted section under the hem to secure it. It’s a small, contained detail — nothing flapping or fraying — which is exactly why it looks finished instead of half-done. This is the move for someone who wants a hint of shape without a big visible cutout.

    The top is paired with high-waisted khaki cargo pants featuring a single visible side pocket, along with tan leather ankle boots. A woven brown leather belt with a small gold buckle sits at the waist, and a stack of thin silver bangles is worn on one wrist.

    3. The Lattice Back

    Cut a rectangular panel out of the back, then cut evenly spaced horizontal slits down both sides of the opening and weave a length of ribbon through them in a crisscross lattice pattern, tying it off at the top and bottom. It takes a few extra minutes to weave, but the payoff is a woven, corset-like detail that looks like it came from a proper pattern, not a pair of scissors.

    It is styled with high-waisted faux leather leggings in matte black, along with pointed-toe black ankle boots featuring a low block heel. A delicate gold layered necklace is visible at the front neckline, and small gold hoop earrings complete the accessories.

    4. The Wrap Shoulder

    Cut one shoulder seam open, then cut a long strip from the extra sleeve fabric and wrap it around the open shoulder before tying it at the back in a small knot. The wrapped strip covers the raw edge entirely, so there’s no fraying visible anywhere — just a clean, styled asymmetrical shoulder that looks like a design choice.

    The top is paired with high-waisted wide-leg linen trousers in a soft beige tone, along with tan strappy flat sandals. A woven straw tote bag with tan leather handles and small gold hoop earrings round out the outfit.

    5. The Shoulder Tie Cutout

    Cut a small oval opening at the top of each shoulder, then cut two thin strips from scrap fabric and tie a tiny bow through each opening. The bows frame the cutouts and stop them from looking like accidental holes, giving the whole thing a finished, almost ribbon-trim quality.

    It is paired with high-waisted white denim shorts with a frayed hem, along with white slip-on sneakers. A thin gold anklet is visible, along with small pearl stud earrings and a light pink hair claw clip.

    6. The Scoop and Cinch

    Cut a wide, deep scoop out of the front neckline, then cut a thin strip from the extra sleeve fabric and thread it through small slits along the new neckline edge to create a drawstring effect, cinching it slightly at the center. The drawstring detail turns a simple scoop cut into something that looks like an actual neckline design rather than a shirt with a chunk missing.

    The top is styled with high-waisted wide-leg corduroy pants in a warm camel color, along with brown suede loafers. A thin gold pendant necklace sits just above the scooped neckline, and small gold hoop earrings complete the look.

    7. The Side Lace-Up

    Cut a series of small evenly spaced slits down both side seams from underarm to hip, then lace a length of cord or ribbon through them like a shoe, tying it off at the bottom. The even spacing is what sells it — measure roughly before you cut so the lacing sits symmetrically on both sides.

    It is paired with high-waisted black denim jeans and black leather combat boots with silver eyelets. A black leather crossbody bag with a thin adjustable strap and small silver hoop earrings finish the outfit.

    8. The Front Knot Duo

    Cut two short vertical slits at the front hem, spaced a few inches apart, then thread and knot the fabric through each one separately to create two small gathered knots side by side. Two symmetrical knots read more like a deliberate design detail than one single knot might, especially on a wider or boxier tee.

    The top is paired with high-waisted white wide-leg trousers, along with tan block-heel sandals. A woven raffia belt bag worn crossbody and small gold hoop earrings complete the styling.

    9. The Button-Look Back Slit

    Cut a single vertical slit down the center back of the shirt from the neckline to about six inches down, then hand-stitch or hot-glue three small flat buttons along one edge of the slit for a faux button-placket look. It only takes a couple of extra minutes, but the buttons are what make this look like a designed back detail instead of a cut.

    It is styled with high-waisted black trousers in a straight-leg cut, along with black leather loafers. A thin gold watch and small gold stud earrings complete the look, along with a structured black handbag with a short top handle.

    10. The Fringe Crop with Clean Cap

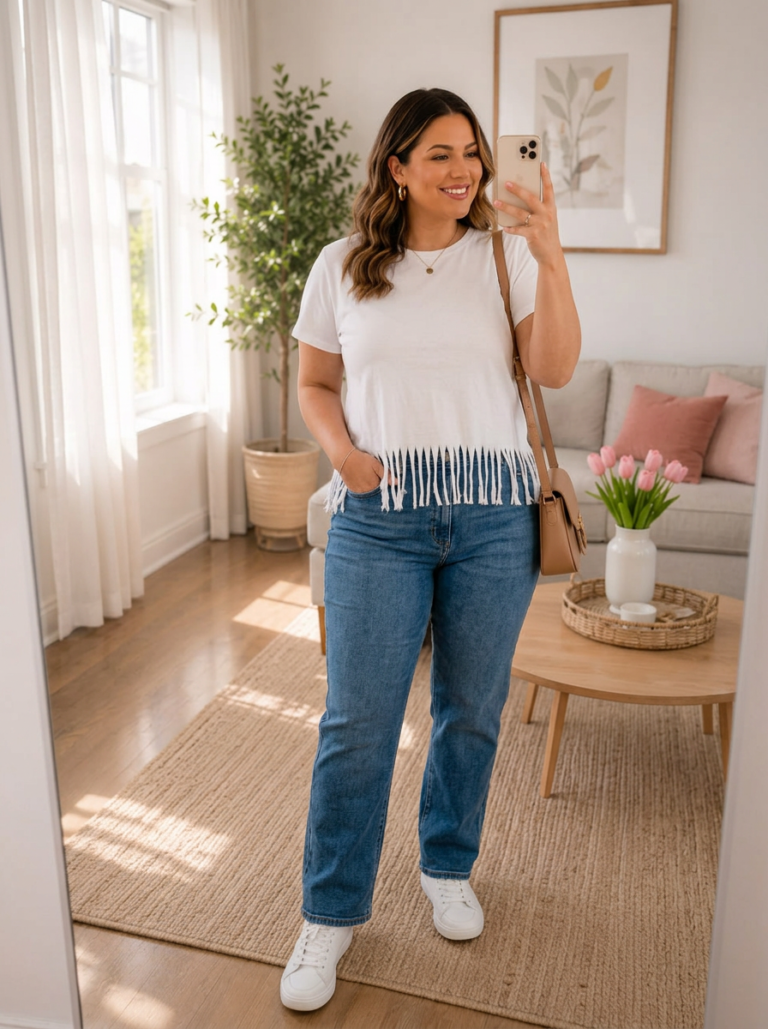
    Cut the shirt into a crop first, then cut a straight strip of the leftover fabric and fold it over the new raw hem like a binding tape before fringing just the very bottom edge of that strip. The folded binding hides the main raw edge, so only the very tips are fringed, giving a much cleaner, more finished fringe than cutting straight into the shirt.

    The top is paired with high-waisted wide-leg denim jeans in a light wash, along with brown suede ankle boots. A woven leather belt with a brass buckle and layered thin gold necklaces complete the outfit.


    The thing every one of these cuts has in common is a finishing step — a knot, a fold, a lace-up, something that hides the raw edge instead of leaving it exposed. That’s the actual secret behind a shirt that looks store-bought: it’s never the cut itself, it’s what you do to it after.

    Pick the one that matches a shirt you’re not scared to mess up, take your time on the finishing detail, and you’ll have something in your closet you’d genuinely believe you paid for.

  • 25 DIY Cut T-Shirt Ideas You Can Do in 10 Minutes

    Your closet is full of t-shirts you never wear anymore — the free ones from races you didn’t run fast, the band tee that’s a little too big, the plain crew necks that just sit there being boring. You don’t need a sewing machine or a Pinterest-tutorial-level skill set to fix that. You need scissors, ten minutes, and one of these 25 cuts.

    Every idea here works on a basic tee you already own, most take less time than your coffee gets cold, and none require you to sew a single stitch. Grab something you’re not precious about and let’s go.


    1. The Fringe Hem

    Cut off the bottom seam of your tee, then snip one-inch strips up to about two inches from where the shirt actually ends. Stretch each strip gently and it curls into a soft fringe instead of looking choppy.

    This is the easiest entry point on the list — if you’ve never cut a shirt before, start here. Pair it with high-waisted jeans so the fringe has somewhere to move.

    2. The Off-Shoulder Slouch

    Cut the neckline wider on both sides in a wide U-shape, then snip off the sleeve seams so the shoulders hang open.

    The trick is cutting slightly asymmetrical — one side dipping a touch lower than the other — so it reads intentional, not like an accident with scissors.

    This one’s perfect for a tee that’s a size too big; the bagginess becomes the whole point.

    3. The Twist-Knot Front

    Cut a small vertical slit at the center hem, about three inches up, then thread the two front hem corners through it and pull tight. It’s less a cut, more a clever loophole — but it instantly shortens and shapes a boxy tee into something with a waist. If your tees run long and shapeless, this is your fix.

    4. The Side Cutout

    Cut two symmetrical vertical strips out of each side seam, from underarm to hem, then knot the loose ends together at two or three points. It shows a sliver of skin at the waist without going full crop top. This one’s great for layering over a bralette or a fitted cami underneath.

    5. The Criss-Cross Back

    Cut two vertical slits down the back panel, about two inches apart, then criss-cross the two straps you’ve created and tie them at the bottom hem. From the front it looks like an ordinary tee; the surprise is all in the back. It’s a five-minute fix that makes a plain shirt genuinely photo-worthy.

    6. The Deep V

    Cut a straight V from the collar down to about mid-chest, then fold the raw edges under once and press with your fingers to keep them from curling awkwardly. This is the move for a crew neck that’s making you look boxier than you want. Works especially well layered under an open flannel or blazer.

    7. The Halter Cut

    Cut off both sleeves entirely along the seam, then cut two long strips from the excess sleeve fabric and knot them behind the neck to create halter straps. It’s a full transformation from tee to halter top in one sitting. Save this one for a shirt with a print or graphic you actually want to show off, since the halter shape puts it front and center.

    8. The Bow-Tie Front

    Cut the bottom hem into two long strips at the center front, leaving the sides intact, then tie them into a simple bow. This is the cutest option on the list and it costs you almost no effort — just two cuts and a knot. It instantly dresses up a basic tee for a daytime outfit that still feels put-together.

    9. The Tank Conversion

    Cut off the sleeves close to the seam, then cut the neckline down slightly to widen the opening. Simple as it sounds, this is the move when summer hits and you own forty crew-neck tees and zero tanks. Cutting close to the seam instead of into the shoulder keeps the shape from getting sloppy.

    10. The Crop with Raw Hem

    Cut straight across the shirt about two to four inches above the natural hem, depending on how cropped you want it, and leave the edge raw and unfinished. Don’t fold it, don’t hem it — the frayed edge is the whole look right now. This is your go-to when you want a crop top but don’t want to commit to buying one.

    11. The Lace-Up Back

    Cut a large diamond or oval shape out of the back panel, then cut small slits along both edges and thread a shoelace or ribbon through them like a corset. It takes a couple extra minutes to lace up, but the payoff is a shirt that looks store-bought expensive. If your closet’s stuck in a rut, this is the cut that pulls you right out of it.

    12. The One-Shoulder

    Cut one sleeve off completely and cut the neckline on that same side down toward the collarbone, leaving the other shoulder and sleeve untouched. The asymmetry does all the work here. This one reads a lot more “designer” than “kitchen scissors,” which is exactly the point.

    13. The Fringe Sleeves

    Cut off the sleeve hems, then snip half-inch strips up the length of each sleeve and stretch them into curled fringe, the same technique as idea one but applied to the arms instead of the bottom hem. It’s a small detail that reads as a big one in photos. Great on a tee that’s otherwise too plain to wear alone.

    14. The Cold Shoulder

    Cut a small oval or teardrop shape out of the fabric on top of each shoulder, right where a cap sleeve would sit, leaving the sleeve seam itself intact. It’s subtle — barely there, honestly — but it changes the whole feel of the shirt. This one’s for the person who wants something different without looking like they took scissors to their wardrobe.

    15. The Keyhole Cutout

    Cut a small teardrop or diamond shape at the base of the neckline, just below the collarbone, and finish the edges by folding them under slightly. It’s a tiny cut with a surprisingly big effect — a plain crew neck instantly gets a focal point. Layer a delicate necklace right in the opening for extra polish.

    16. The Braided Hem

    Cut the bottom hem into three even strips per section around the shirt, then braid each set of three together and knot the ends. It takes a couple extra minutes compared to a straight fringe cut, but the texture payoff is worth it. This is the upgrade move once you’ve mastered the basic fringe hem from idea one.

    17. The Star Cutout

    Sketch a simple star shape lightly with a fabric pen on the upper chest or shoulder area, then cut it out cleanly with small scissors. Small graphic cutouts like this are having a real moment, and a star is the easiest shape to cut accurately without a steady hand. Wear it over a contrasting cami so the shape actually shows.

    18. The Scoop Back

    Cut a wide, deep U-shape out of the back panel only, leaving the front completely untouched. From the front it’s just your regular tee; turn around and it’s a whole different shirt. This is a smart cut for anyone who wants a bit of drama without changing how the outfit photographs from the front.

    19. The Asymmetric Hem

    Cut the bottom hem on a diagonal, starting high on one hip and sloping down to the original hem length on the other side. It’s one clean diagonal cut, no measuring required, just eyeball a slope you like. This works especially well on longer tees you’d otherwise tuck in and forget about.

    20. The Choker Neckline

    Cut the collar off entirely, then cut a two-inch strip from the leftover fabric and tie it snugly around your neck like a fabric choker, leaving the shirt’s new raw neckline exposed underneath. Two cuts, one knot, and a totally different neckline. It’s a favorite for band tees where you want the graphic to stay the star of the show.

    Ten minutes, a pair of scissors, and a shirt you were about to donate anyway — that’s genuinely all it takes to make something new. Pick the cut that matches the tee you’re staring at right now, not the one that looks hardest on this list. You can always cut more off. You can’t cut less.

    Start with one. See how it feels. Then go raid the rest of that drawer.